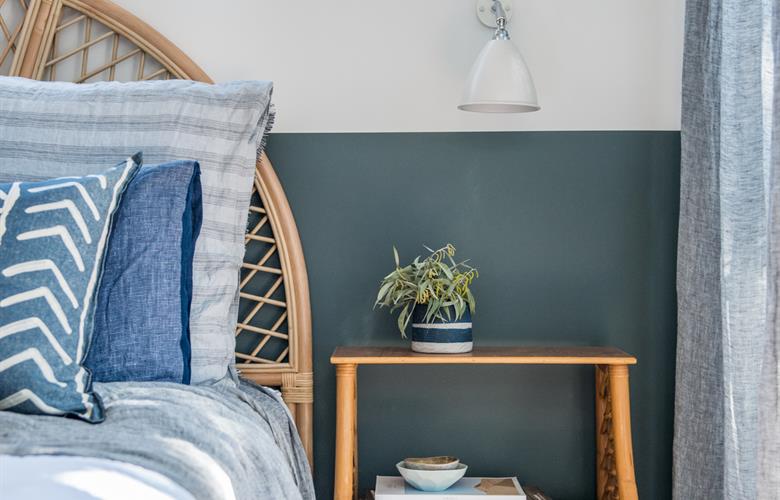
Paint is always a cost effective way to make a statement in a space. Today I’m going to use a really simple technique to create a painted bedhead in the master bedroom of our studio.
Step 1 : Prepare the Surface
Like all painting preparation is key! We’ve prepared these walls with Taubmans 3-in-1, and used ‘Cotton Ball’ in a low sheen finish as our main wall colour. Our feature colour is ‘Hoya’. Use this handy Taubmans Calculator to work out how much paint you’ll need for your project.
Step 2 : Mark the Feature Colour Line
Every room is different, and for this bedroom we’ve decided to paint our line one metre up from the skirting. Mark out your height with a pencil at regular intervals along the wall. Attach painter’s tape at one end and pull tight to form a straight line.
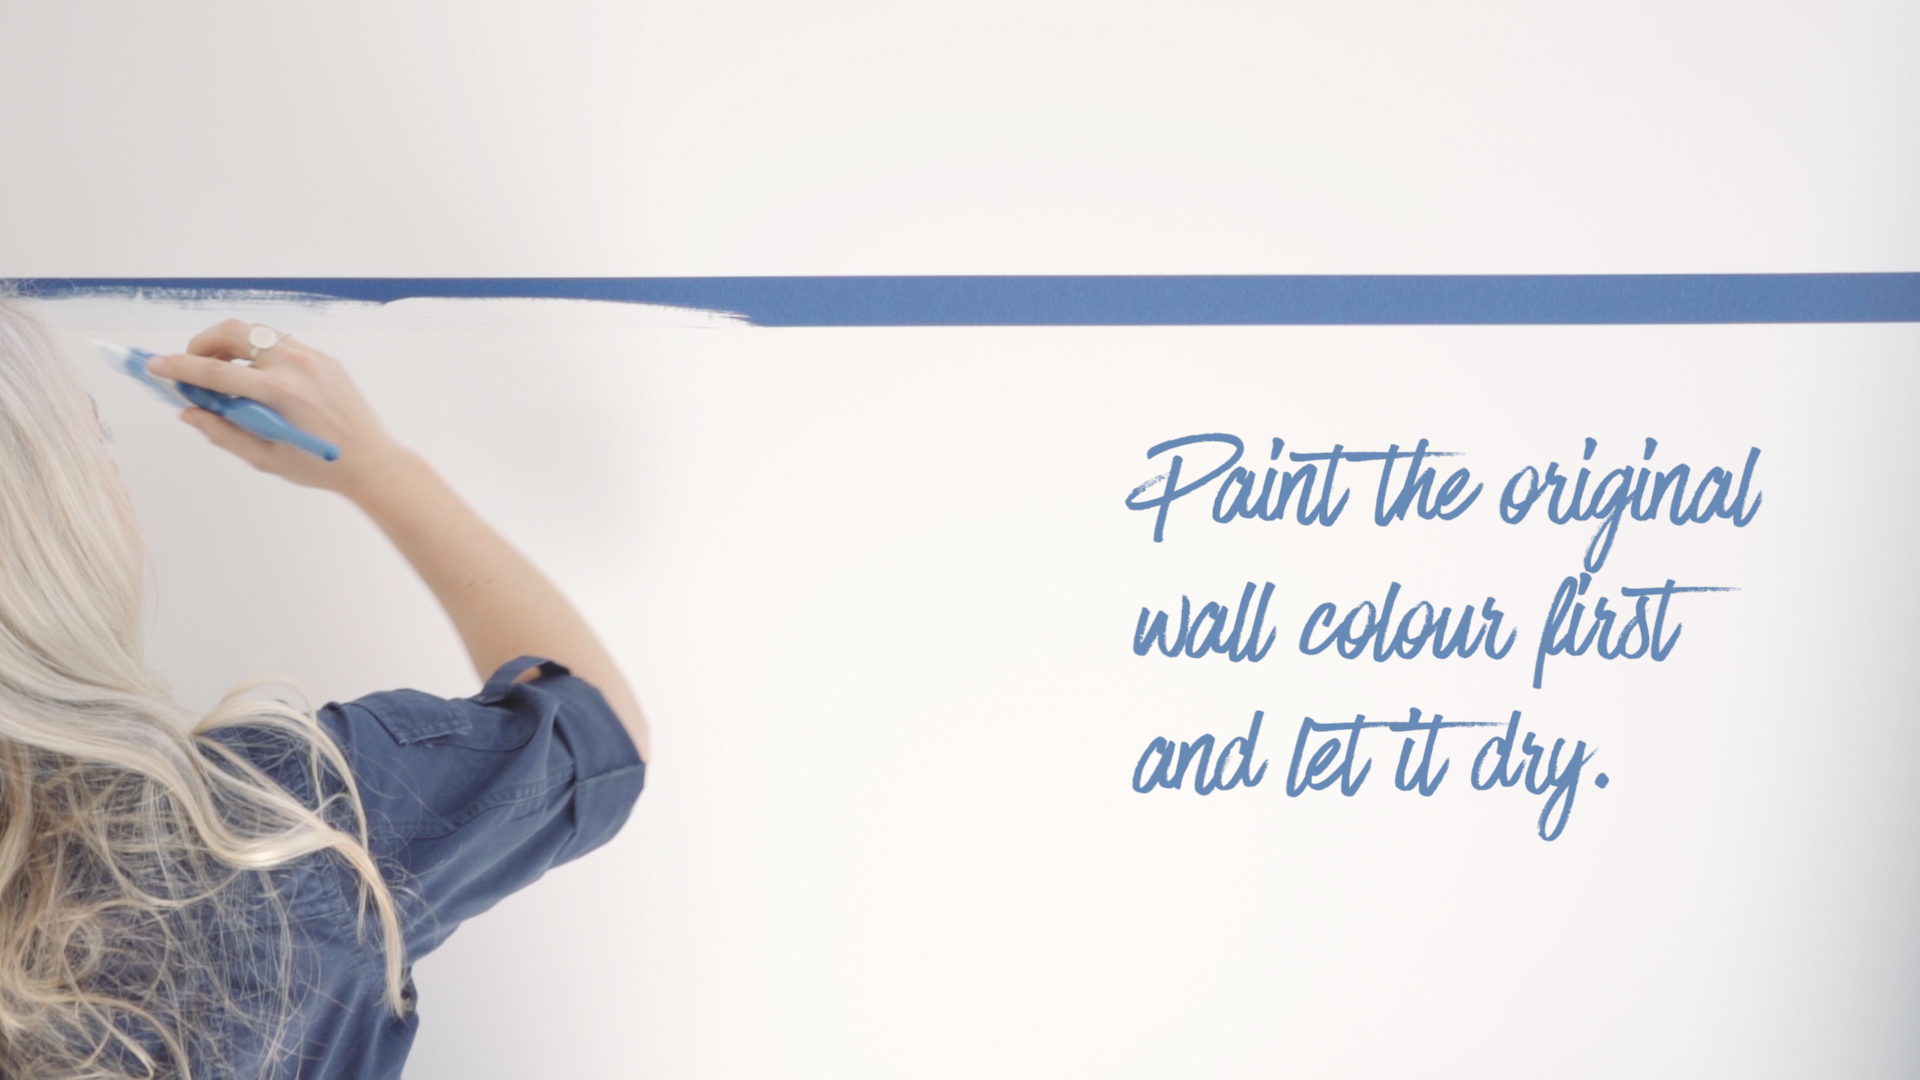
Step 3 : Eliminate Colour Bleeding
Using a paint brush, paint one coat of the main wall colour along the painter’s tape. In our case, this is ‘Cotton Ball’. Let this dry before painting your feature colour up to the same tape line.
Step 4 : Paint the Feature Colour
Once the wall colour is dry, use the paint roller to apply the feature colour – we’ve used ‘Hoya’ – up to the same tape line.
Step 6 : Finishing Off
When all the paint is dry, it’s time to carefully remove the painter’s tape to reveal your new painted bedhead!