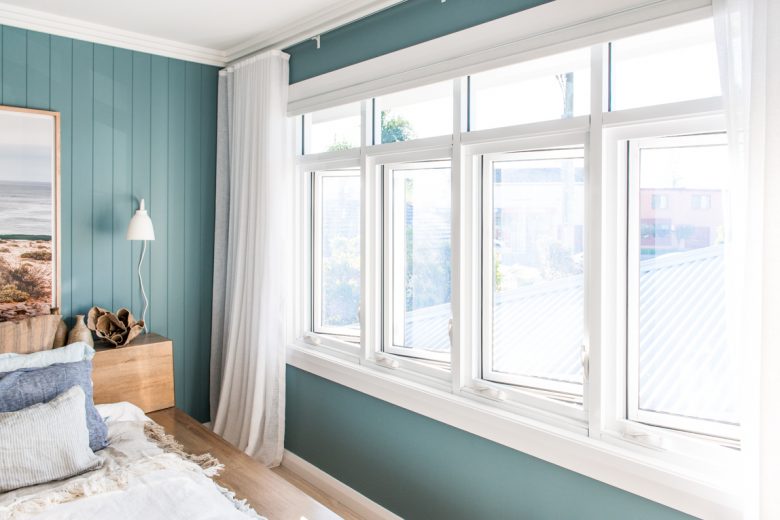
Step 1 : Planning & Preparation
Work out how many sheets you’ll need by dividing the length of your wall by 1200mm (the width of the sheet). Don’t forget to also measure the height of your wall. Have all your tools set out ready to go and a clear area to work in. I would also recommend removing your skirting board so that the sheet can go down past the top of your skirting board and can be re-fitted once you have completed the paneling on your wall.
Step 2 : Marking your First Sheet
Firstly, work out the length and height of your first sheet. To do this, measure from the floor to the underside of the cornice, and then subtract 10mm – this will then be the size you will cut your sheet. Once you have your sheet cut, take it for a dry run! What I mean by that is to fit the sheet to the wall before you go getting glue everywhere. If you’re happy with how it first, head to step 3. If you notice a gap at the top of your notice you can scribe it to fit neatly.
Step 3 : Glue Up
Now that you have your sheet cut and ready to go, it’s time to glue up the wall using the acrylic stud adhesive. You want to make sure you do dabs of glue about the size of a 20c piece and space the glue dabs roughly 300mm apart. Only glue the space where the sheet is to be fitted.
Step 4 : Install the First Sheet
First the sheet to the wall and give it solid pat ensuring it’s nice and flat against the wall. You may need to level the sheet using a chisel and hammer to leaver the sheet up tight to your cornice. Once you are confident that it’s level, you can nail it off.
Step 5 : The Next Few Sheets
Again, measure the height of your sheet and cut. Take it for a dry run and make any adjustments needed for a tight fit to your cornice. Once you’ve done this it’s time to glue up and fit your sheet to the wall. At this point you want to make sure you get your join perfect with the other sheet. Push the sheets together joining the groove into the joining strip. The join should now be concealed leaving no gap. Once you’re satisfied with this, nail the sheet off and repeat this step until you reach your last sheet.
Step 6 : The Final Sheet
Measure the distance from the wall to the last sheet you’ve installed. It’s a good idea to take a measurement from the bottom and the top in case the wall you’re butting into runs out. Transfer the measurements onto your last sheet and cut. Dry run, make adjusting cuts if needed, glue up, fit the sheet in place, make sure the join with the other sheet is good, then nail off.
Step 7 : Finishing Off
Now all your sheets are installed it’s time to finish up and prep for paint! Fill all your nail holes with putty/timber filler. Give the filler some time to set then sand. If there are any gaps between the cornice and sheet, or the internal wall and the sheet, simply gap fill with Selleys gap filler using your caulking gun. Re-fit your skirting board and get painting!