Before we built any internal walls in the Master Bathroom, Kyal and I spent a long time thinking about the layout. We had plenty of space to work with, so with this in mind we knew that we could create a walk-around shower with a luxurious feel. Although we love the challenge of designing bathrooms in small spaces, what a treat it is working with plenty of room!
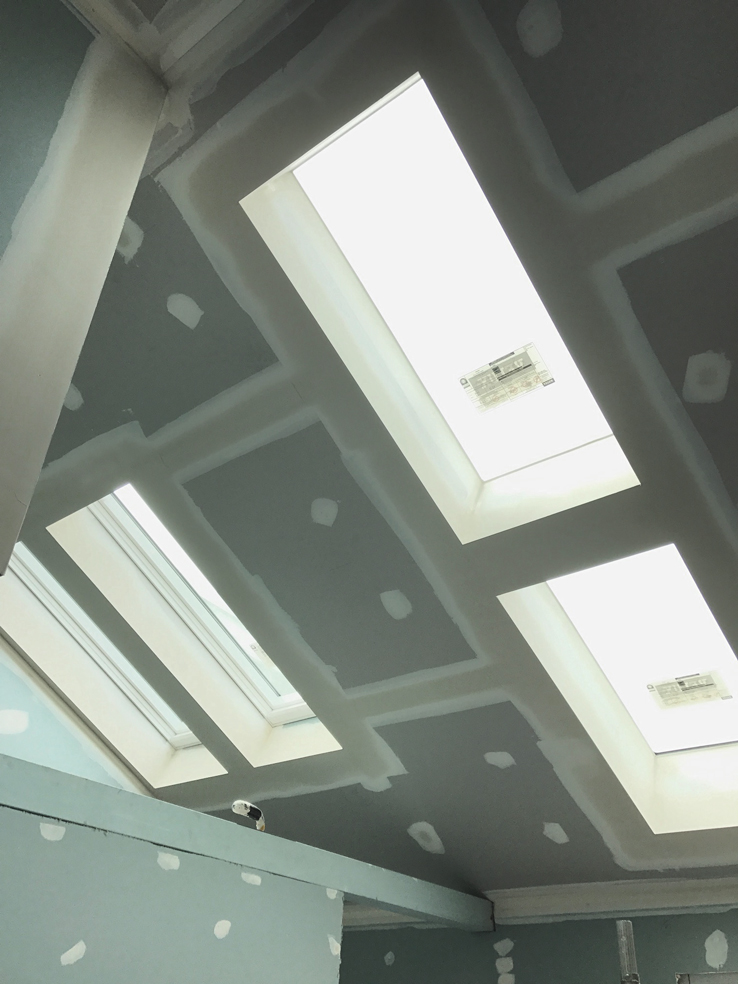
When sketching out the space, we moved the shower about 5 times! It’s such a teething process but well worth it in the end as we couldn’t be happier with the layout. We have two Velux skylights positioned directly over the shower area, and then another two Velux over the vanity and bath area.
For the flooring base in our bathroom, laundry and powder room, we’ve used Scyon Secura interior flooring. There are quite a few benefits to using this product, the main on being that it’s 40% faster to install than conventional compressed fibre cement sheet.
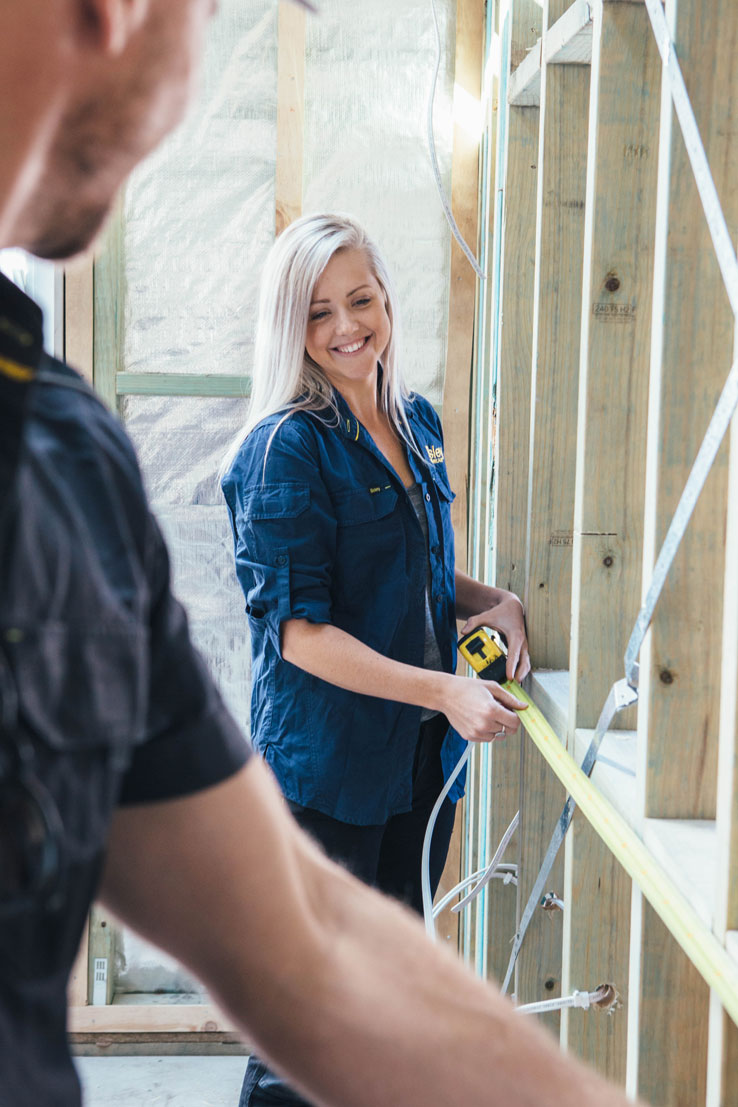
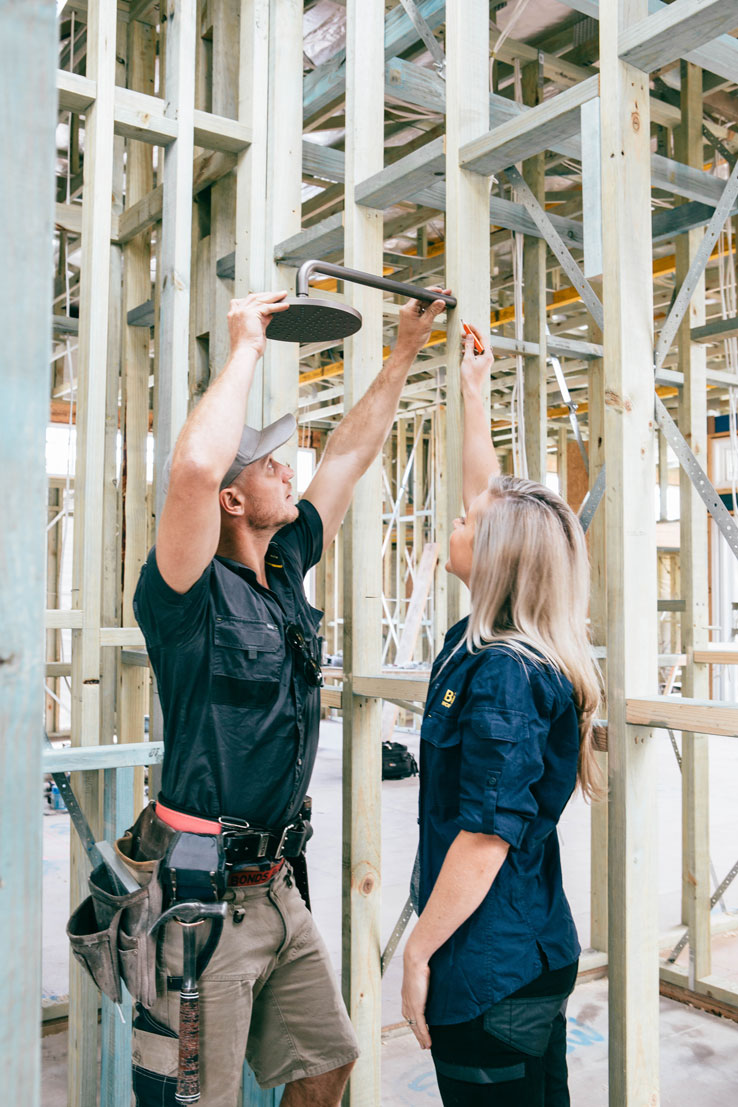
With the wall frames up, plumbing rough in occurs. We always make sure we have the bathroom products on site – so we can work out exact heights and placement of fittings. This is especially important if using mixers, as the plumbers will need to install these. At this point, we also work out where our towel rails/hooks and accessories are going. This is so that Kyal can put in extra timber supports prior to sheeting if required.
To prevent heat transfer externally, we’ve insulated with Bradford Gold Batts and for thermal insulation and reduced noise transfer internally, we’ve used Bradford’s SoundScreen Acoustic Insulation. We’re building a family home so the SoundScreen is great for creating a quieter home.
Once plumbing and electrical are roughed in, we’re ready to sheet! We’ve used Gyprock Aquachek, which is specifically designed for use in wet areas as it is resistant to moisture and humidity.
Ceilings sheeted and set – ready for paint
Once sheeted and set, we’re ready to waterproof. Our tiler then completes a sand and cement bed with fall into drains as appropriate. Once the screed is dry, we always do another coat of waterproofing to prevent efflorescence coming through grout lines in tiles from the sand.
It’s always an exciting day when tiles get laid! Our trusty tiler Matty (Matt Smith Wall & Floor Tiling) has had a work out laying these! The large format wall and floor tiles are ‘Elmina White’ 597x1197mm from Beaumont Tiles. I love the idea of a large tile – it’s a clean, minimalistic look with fewer grout lines, meaning it’s easier to clean! To add texture, on one wall we’ve tiled with the ‘Devonshire White Gloss’ 300x75mm, also from Beaumont Tiles, with Easycraft EasyGroove cladding above.

Our tiler Matty installing the large format tiles in the shower area
In collaboration with Loughlin Furniture, we’ve designed an absolutely gorgeous American Oak double vanity. For our bench top the guys at Edstein Creative Stone have installed Silestone by Cosentino ‘Yukon’ in the suede finish. I love the subtle pattern in this stone, and the suede finish offers a refined matt finish.
For laundry cabinetry, we’re using Polytec ‘White Cotton’ in the matte finish. Kyal has installed a custom timber handle, shelf and hanging rail using American Oak which has really given the space extra personality. We’ve continued with the Silestone by Cosentino ‘Yukon’ in both the laundry and powder room. Now that plumbing fit-off has occurred, we can style these spaces up with all the finishing touches!
Overall, we couldn’t be happier. This bathroom is hands down our favourite to date. The highlight for me is the American Oak beam which supports the shower wall, but I absolutely adore the large format tiles and custom vanity and mirrors.
Check out all the finished shots and supplier details of these rooms – Master Bathroom, and Laundry & Powder Room.
Watch Episode 6 of the Long Jetty Online Series, brought to you by RAMS.