Wow. It’s been a big lead-up to get to this point! There’s been a lot of hard work and sacrifice but here we are, ready to complete the finishing touches on our family home.
Although we regard the landscaping as the final piece of the puzzle it’s something we planned very early on – prior to council submission. We worked with our drafting company, Etchells Building Design, on the design of the home and for the exterior we engaged our friend Mon Palmer to work with us on landscaping design.
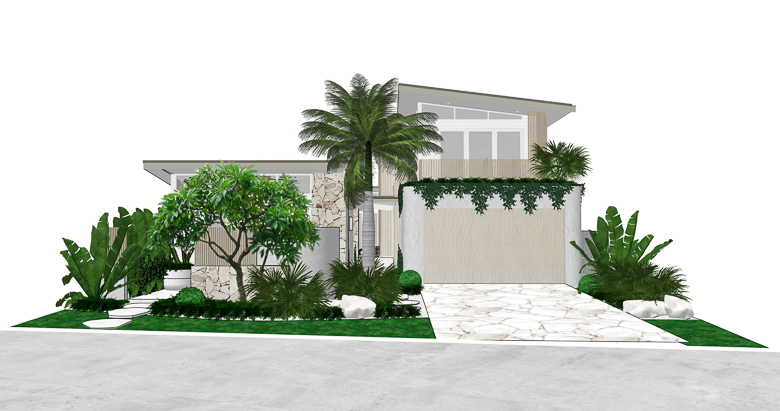
Landscaping render by Mon Palmer
Originally we had the pool a lot closer to the house – next to the rumpus room – and it just didn’t feel right. Mon Palmer came in with fresh eyes and suggested a move to the corner of the yard, off the back of the studio. This immediately opened up the whole yard and allowed for a sitting/lounge area off the kitchen and rumpus.
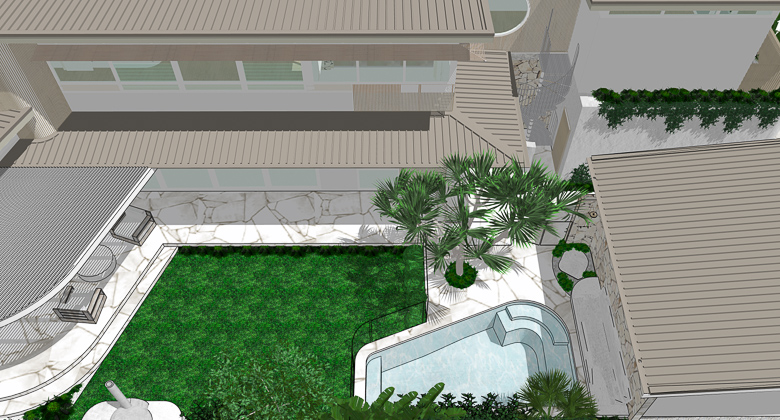
We moved the pool into the corner of the yard, next to the studio.
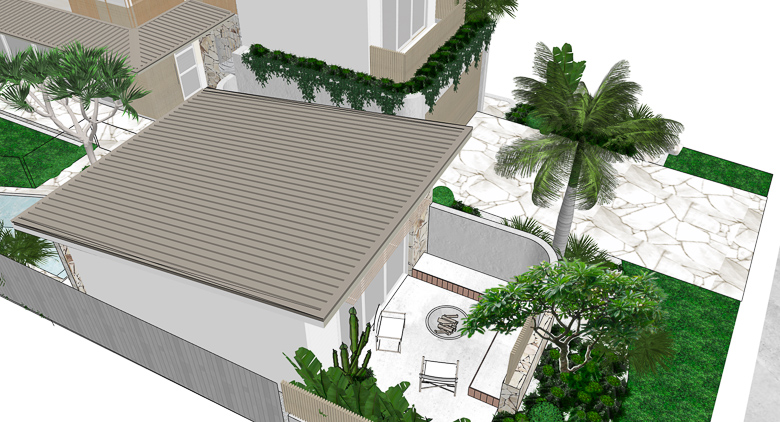
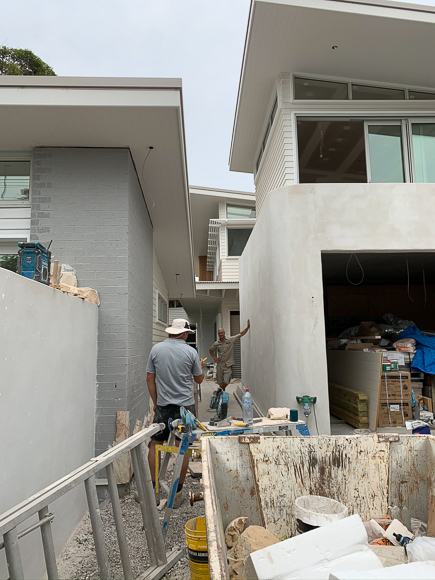
As with the rest of the home, our style is ‘Australian coastal meets Mediterranean villa’ and we really wanted to create that vibe from the very first impression. The curved rendered walls of the garage certainly help with this and we’ve created a similar curved blockwork wall to create the private guest house courtyard on the other side of the block. This studio also acts as a way to create a ‘villa’ style yard for the main house, creating plenty of privacy from the front.
The studio and garage at the front of the block create privacy for the main house.
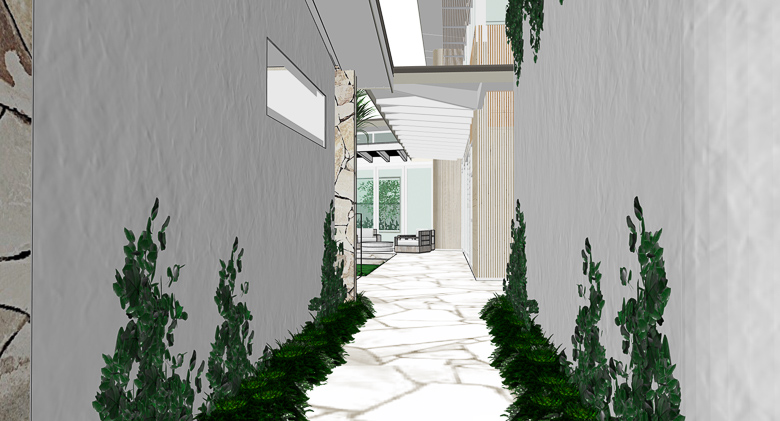
The curved blockwork outside the guest house creates a private courtyard.
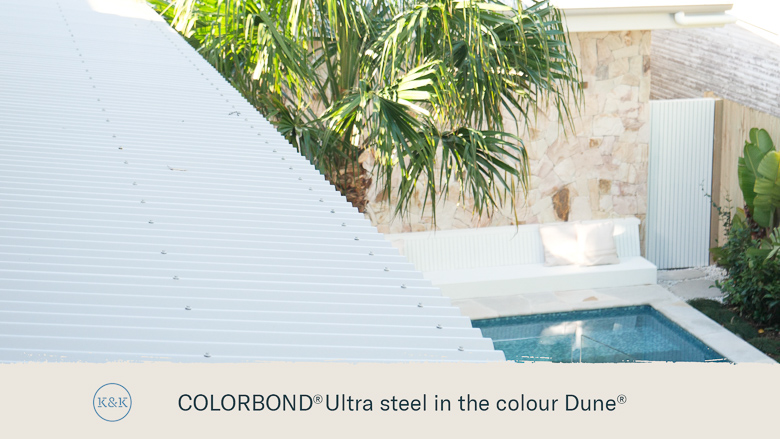
As I’ve mentioned before, with my overall vision in mind, the roof is always my first big colour decision. We’re within 200m of breaking surf so we’ve used COLORBOND® Ultra steel. Material-wise, we knew we wanted to incorporate white James Hardie Linea Weatherboard and sandstone. I was also conscious of the colour palette I wanted inside which always helps guide my decision for the exterior (and vice versa) to ensure I maintain consistent flow from the outside to the inside. The blush undertones of COLORBOND® Steel Dune® works well with warm colours such as sandstone, sand dunes and coastal tones – perfect for our project.
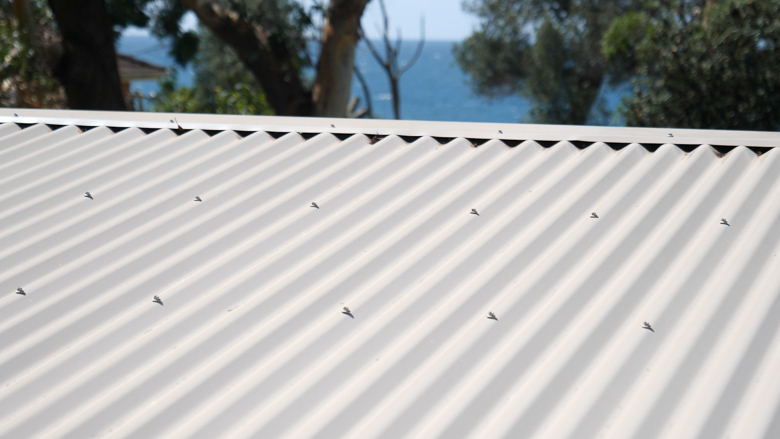
COLORBOND® Ultra Steel Dune® works well with warm colours such a sandstone, sand dunes and coastal tones.
I’ve aimed for a consistent colour palette to flow from outside to inside.
One thing we’ve been thinking a lot about over the last few years is a switch to a renewable energy source. The main reason for this being the environmental impact, but also for the cost savings. We’ve looked into a few companies over the past few years, however we made the decision to use a Clipsal Solar system for a number of reasons. Clipsal Solar is part of a trusted Australian brand that offers service beyond installation (we’ve used Clipsal electrical products throughout many of our renovations over the the years – including this one)
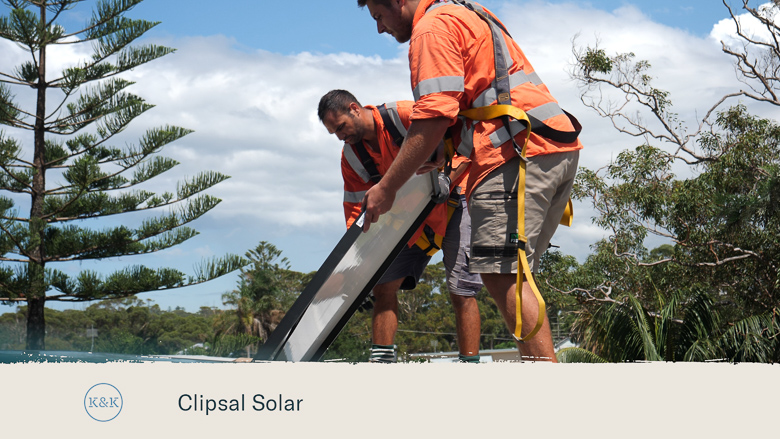
Solar panel installation.
We were also impressed with the process and their approach to the system that was right for our home. It wasn’t a ‘one-size-fits-all’ approach, but tailored to our home, budget and lifestyle. As part of the installation process, they’ve installed sensors in our home as part of their Pulse Analytics Kit, which essentially enables us to track our electricity consumption habits via the Pulse app on our phones. Clipsal Solar will then provide support to ensure we reduce our energy bills and support long-term solar savings.
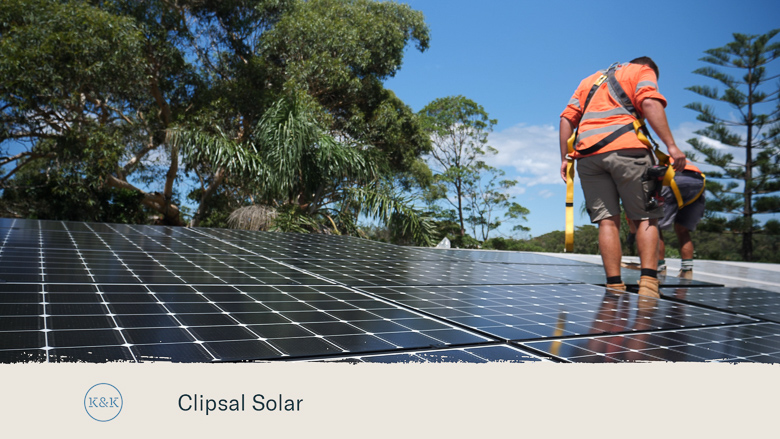
A solar package tailored to our home and lifestyle.
A good example of this was yesterday when Kyal was on the phone to the support team discussing what was using up the majority of energy on our system since we’ve moved in. I’m keen to continue to learn about our energy expenditure and subsequently make changes for the better, so watch this space!
As previously mentioned, our home is essentially our take on the Australian Beach House, and nothing says Aussie beach house to me more than crisp white weatherboards! The shadow line and angle detail of the James Hardie Linea 150 Weatherboard and the resistance to shrinking, swelling and cracking mean it has been our weatherboard of choice for the last few years. To break up the weatherboard, we’re using 42x18mm blackbutt cladding, sourced through Kincumber Mitre 10. We’ve coated this in Johnstone’s Professional Indoor/Outdoor Varnish in ‘natural’.
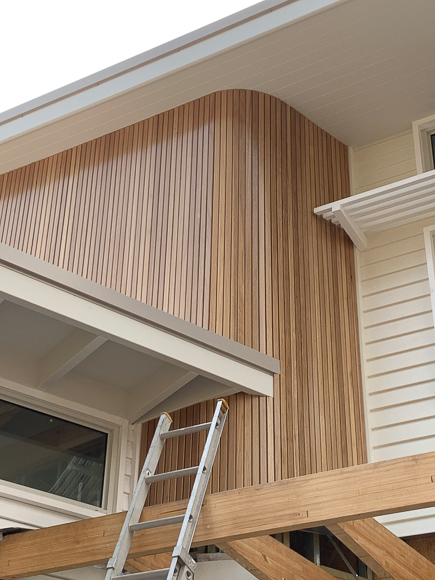
Vertical blackbutt cladding to break up the horizontal lines of the weatherboard.
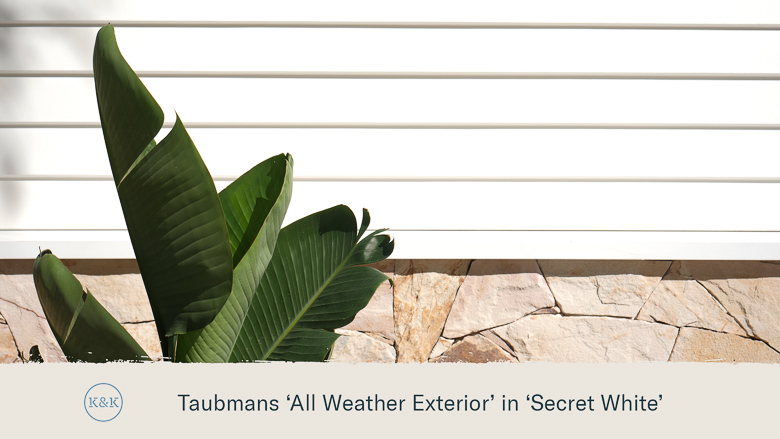
When selecting exterior colours I usually narrow down my choices to 3-4, buy sample pots, and paint in numerous locations around the house to get a feel for how each colour works in different lights, and at different times of the day. I did this early on in the build as we had to complete the paintwork on the upper level prior to dropping the scaffold. We’ve locked in Taubmans All Weather Exterior Low Sheen in ‘Secret White’ for the weatherboards, Taubmans ‘Brilliant White’ semi-gloss for window trims, and All Weather Exterior Low Sheen in ‘Surfmist’ for eaves and fascia. We will use Taubmans All Weather Exterior Low Sheen in ‘Aspen Snow’ on the rendered surfaces.
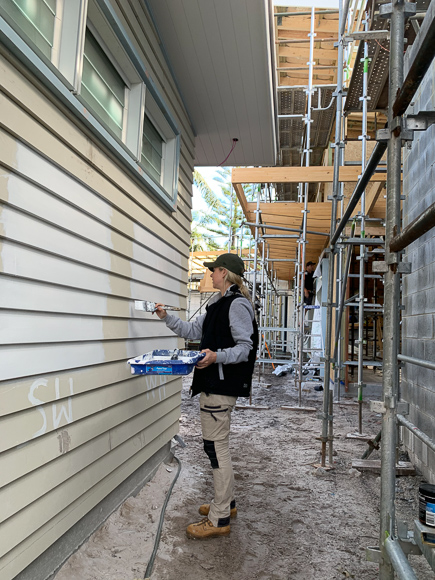
Feels good when you lock in the exterior colour palette!
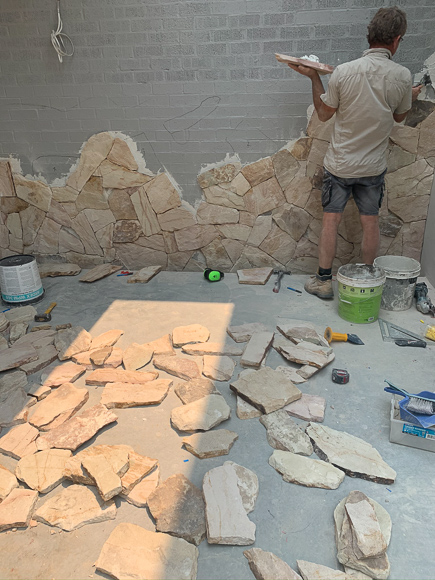
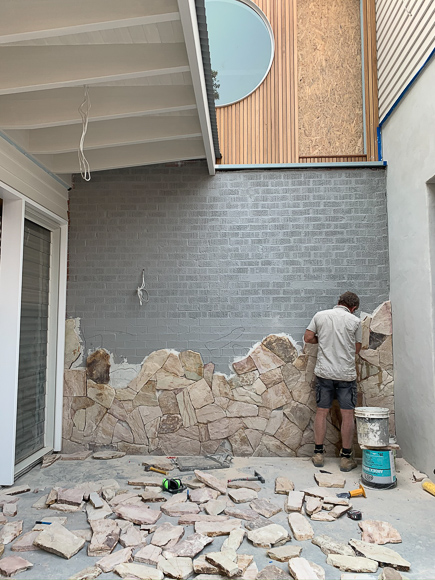
In keeping with our ‘Australian coastal meets Mediterranean villa’ feel, we’ve selected Santorini wall cladding from Stone Style to break up the white surfaces. We started this process with Garry, Kyal’s step-dad who came from South Australia to help us, but we definitely underestimated how long the stone work would take! We ended up also recruiting Marty and Neil from Stone Co Stone Masons to jump on board, and without them I think it would have taken us until Christmas 2020! We’ve chosen to lay in a dry stack with no grout so the process is time consuming.
For our walkways and outdoor entertaining areas including the pool, we made the decision early on to use a sandstone crazy pave. this meant that firstly we needed to form up for the concrete. What a difference that made to the morale on site! Suddenly we weren’t tracking sandy dirt all through the jobsite!
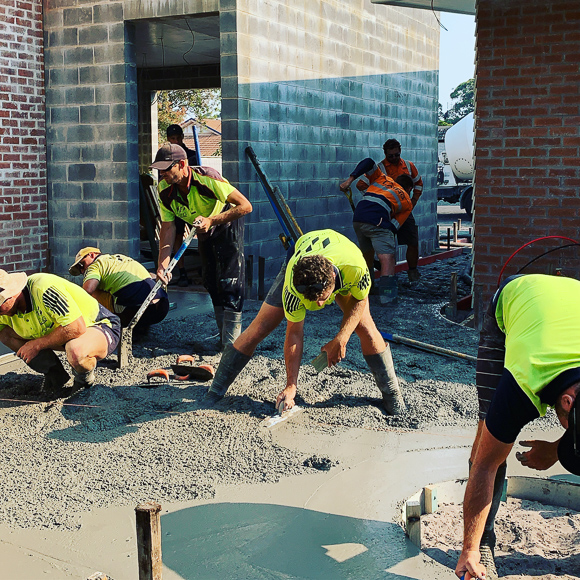
The Laing Concrete boys pouring our concrete.
The sandstone for the crazy pave (again from Stone Style) arrived in large, 30mm thick slabs. It meant we were able to achieve a customised look by breaking the slabs ourselves on site. We wanted the pieces to be large and have mostly soft edges (not too angular and sharp) and look more uniform than the Santorini wall cladding. We’ve also used larger slabs of the sandstone as large stepping stones leading up to the front gate, which has created a nice interesting entryway that we’ve been able to soften with greenery and crushed white granite.
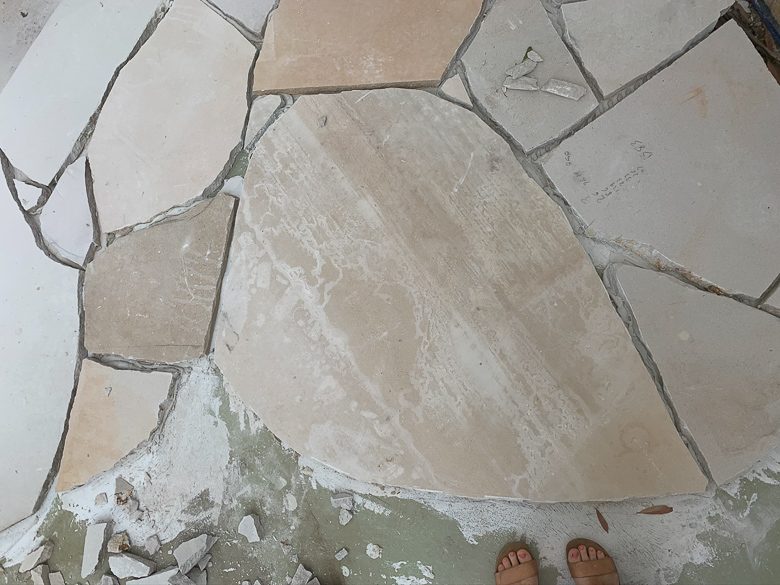
The 30mm Sandstone Crazy Pave has also formed the coping around our pool.

When it came time to designing the garage door we wanted it to tie in with the blackbutt cladding on the main house so we supplied Delta Garage Doors with 42x18mm blackbutt batons, and they custom made our door to suit. We then engaged the awesome team from Macquarie Garage Doors to complete the installation.
Custom blackbutt garage door installed by Macquarie Garage Doors.
As we enter the final stage of the build, it’s been good to review the budget – as we have at all major stages of this build – and take note of what’s left for landscaping! It’s amazing how quickly things can add up, and if you’re not logging expenses on a regular basis, spending can really get ahead of you. This can be especially important when unexpected expenses have arisen over the build.
A RAMS home loan tailored for construction is dependable for this. Payments for construction are made progressively throughout the build, rather than one huge lump sum that you have to try and manage yourself from day 1. Remember though, your repayments will increase as the build stages progress. RAMS are experts when it comes to home loans tailored for construction and can help you navigate the complex process. They will also pay your builder directly, which could help keep your build on track and take some of the stress out of the process for you. The other benefit is you are making interest-only repayments during the construction period, meaning your initial repayments will be lower which may help with your cashflow.
With the remaining budget in mind, we’ve sourced two large Livistonia Australis Palms (AKA Australian Cabbage Palm or Fan Palm) from Grow Rite Trees. It was an exciting morning seeing these go in the ground! The rear palm had to be craned over the top of the studio which was exciting for the kids, but nerve wracking for me!! Absolutely worth the stress as they add so much life to the exterior.
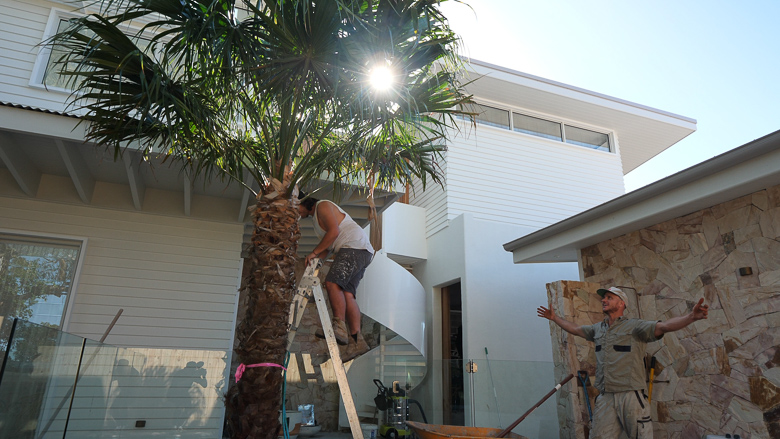
Kyal’s sheer joy that the palm is in next to the pool!
Final planting has been a family affair over the last few weeks and it’s been really nice to get this kids involved in this. Vada is a little but young still, but I feel as though Ziya has really taken on board some of the principals we’ve taught him around planting trees and making sure they’re well-watered. Vada was not even one year old when we started this build, and it’s so special to know we’ll be able to watch all these trees grow alongside our kids. We’re beyond grateful to have been able to complete this beautiful build and we’re so looking forward to creating plenty of memories here with our family and friends. Now, excuse us while we go and sleep for a whole week!
Click here to watch Blue Lagoon Build Episode 8 – Palm Trees & Sea Breeze
Blue Lagoon Build series is proudly brought to you with the support of RAMS Home Loans.