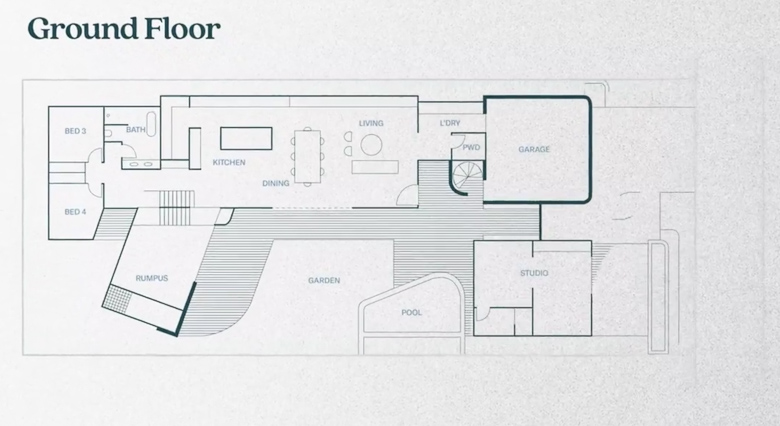
The heart of the home. Our starting point for this whole build was on the premise that I wanted to be able to stand in the kitchen or living area, and be able to watch the kids in the yard. However, although this is an open plan space I still really wanted to zone each area so it didn’t feel like a big, open, clinical room.
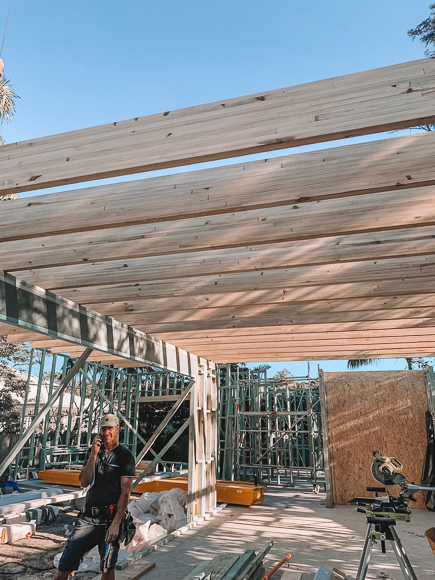
Another wish list item of mine was exposed beams in the living areas. I love the warmth that the beams bring to a space, and felt it would also work functionally. In the framing stage we worked with National Frame and Truss and did a lot of research into our options. Our engineers at Westera Partners recommended the Hyne Timber GL Beam. They are huge and span approximately 7.5m. They have formed a beautiful feature for our ground floor ceiling, and also run outside which has been a nice way to create the indoor-outdoor flow.

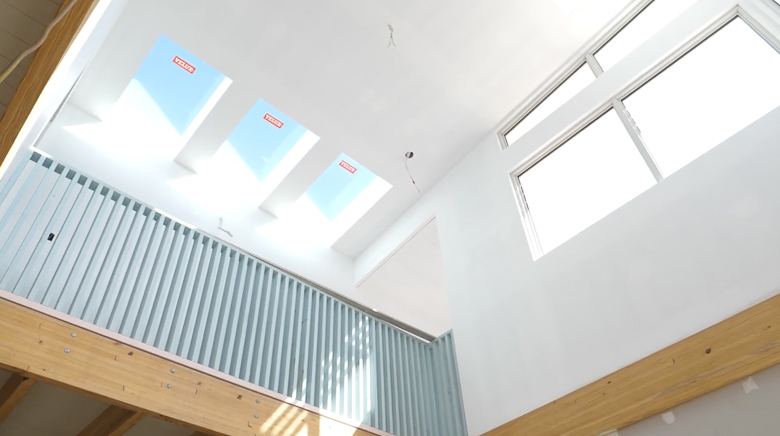
Early on in the design phase, we factored in a void over the entryway and living area to capitalise on all the north light. This ensures our living area will have great natural light for the majority of the day.
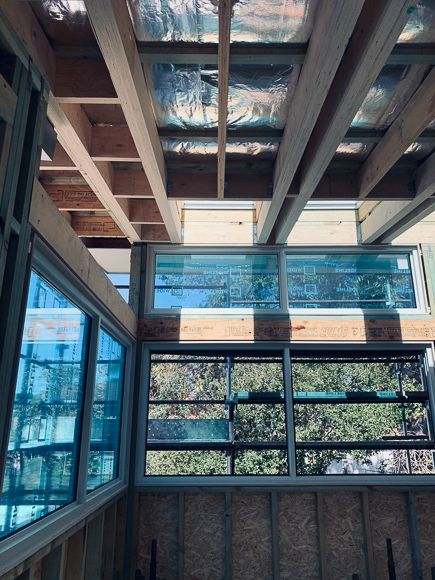
Wideline highlight windows and Velux Skylights over the void.
In this space is a walkway along the second level that connects the master bedroom to the office, but the office also has an external staircase which will serve as the primary entrance.
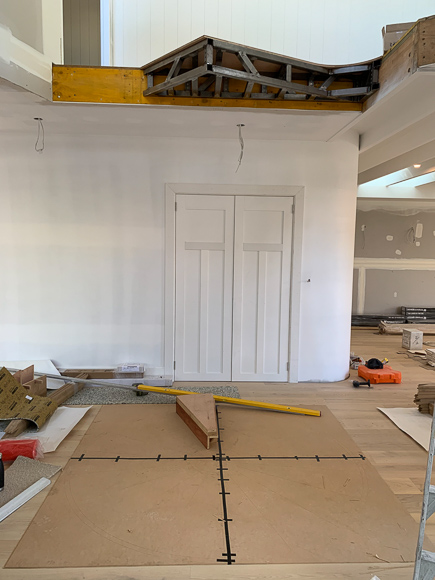
Because this is such an open plan space, we needed to ensure that we didn’t allow one zone to creep too far into the next. So as soon as we were at lock up it was time to stand in this big space and ensure that we were allowing enough room. What I mean by that is that we wanted to be careful not to bring the kitchen out too far, which would impede on the dining room, and in turn impede on the living room. We also needed to be very specific with roughing in our lighting and know exactly where cabinetry would sit. Standing in the room and measuring things out with masking tape has always been a very valuable exercise for us. In this case, it firmed up for us exactly where our kitchen would sit, where our dining table would be and most importantly, whether we would get a fireplace!
We’ve always had the fireplace on the plans and made provisions for it when bricking in and sheeting the wall, but I had been concerned that it may feel too dominating. But after marking everything out, we decided to lock it in! In particular, we’re going with the Cheminees Philippe Horama Vitreous Freestanding Firebox that we sourced from Cheminee. Completing the installation is Armanno Building Services.
Between the Hyne Beams we’ve allowed a cavity to run electrical, and then battened and sheeted with Easycraft EasyVJ 100.
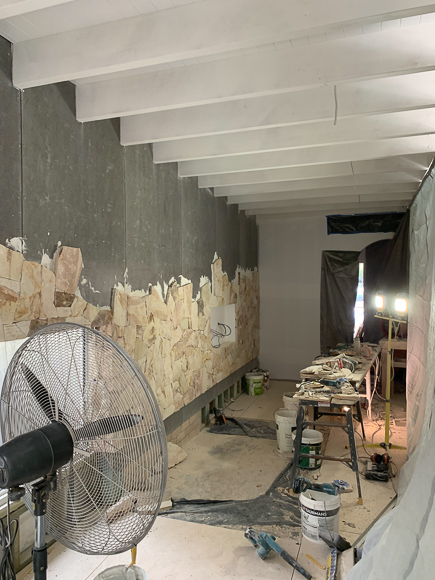
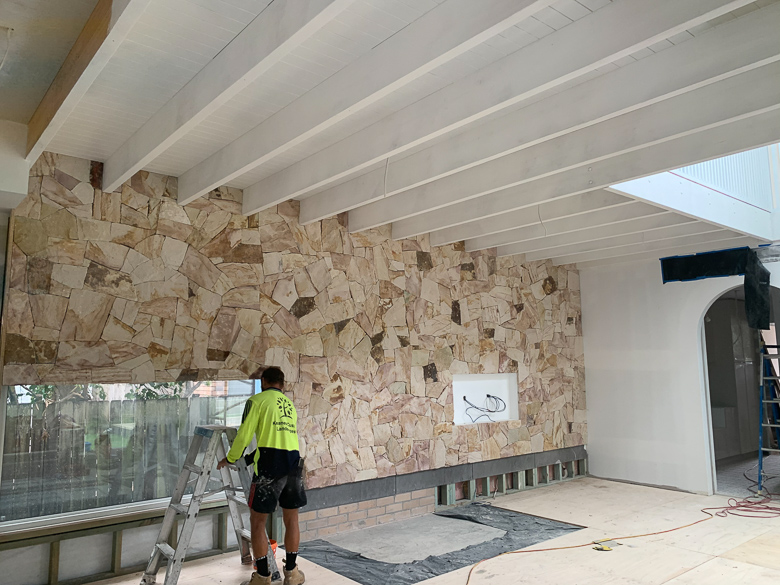
We have had our trusty painters spray the ceiling with Taubmans 3-in-1 Prep, followed by Taubmans Endure One Coat Ceiling. With this done, it’s time for the feature stone wall! As per the outside, we’re using Santorini Random Sandstone 30mm thick wall cladding, sourced through Stone Style. The guys from Stone Co Stone Masons have laid in a ‘dry lay’ stack without grout – again in keeping with the external finishes.

We’ve left a niche for a TV swivel bracket and electrical provisions, but I have a beautiful artwork lined up to cover this niche as we don’t need two TVs in the house for now. It’s still nice to know that if we ever wanted to put a TV there (even for an event) that we could.
A fixed Wideline Paragon Window in Textura® Surfmist finish in the dining area will have a window seat running underneath it. We’ll plant a nice, lush green garden behind this window to look out onto.
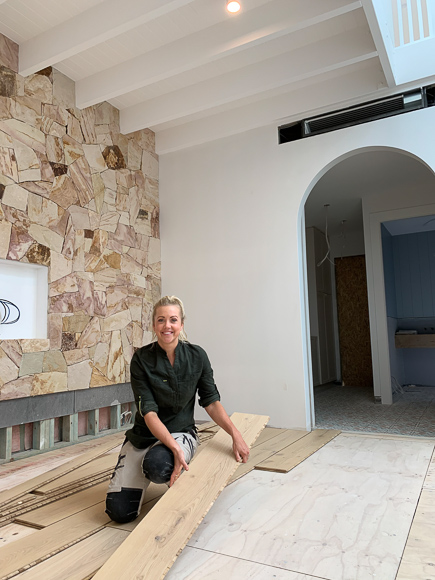
Stone feature wall complete; time for more painting and flooring!
Given this is such an open plan space, by the time we’ve done the feature stone wall and allowed for all the kitchen cabinetry there isn’t a lot of wall left to paint! So for consistency we’ve painted the remaining walls with Taubmans Endure ‘Big White’.
Excited is an understatement!
Next up, it’s flooring time! We’ve chosen Eterno Grande in 2200 x 220 x 20mm from Tongue n Groove in ‘Freado’ and we couldn’t be happier with the oversized board! Kyal has been eyeing off this flooring for a long time so he’s a happy man! This timber flows into the rumpus area and hallways, tying all these spaces together.
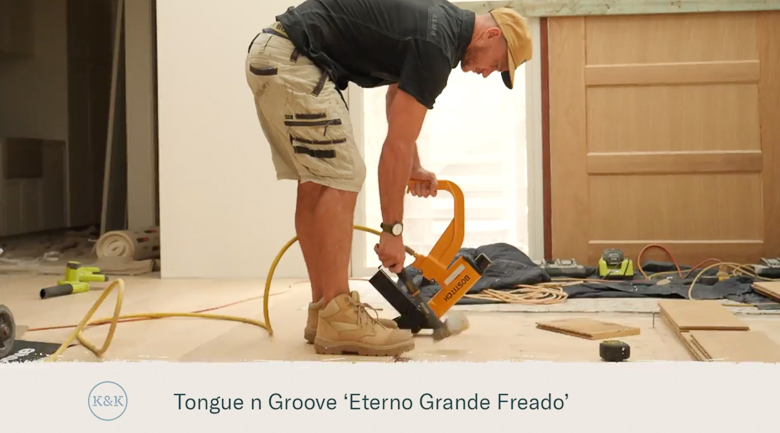
Laying the flooring means we’re one step closer to moving in!
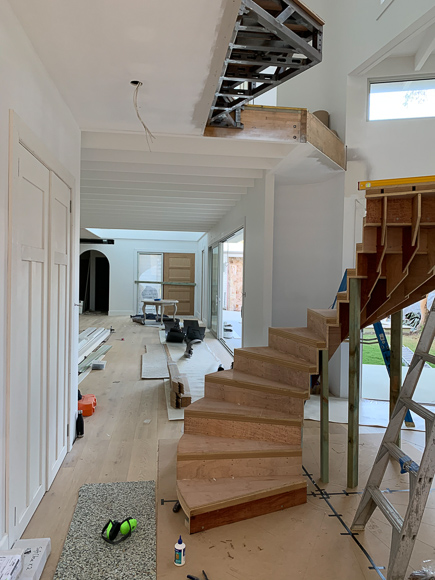
Progress is also happening down the hallway where we’ve factored in a large linen cupboard. We’ve used the MODA PMOD6 Corinthian Doors to tie in with the bedroom doors. We love the panelling on these doors, the simple shaker lines add a nice detail to the home. The curved wall leading from the kitchen to the rumpus is a beautiful, soft feature that again ties the soft curves from outside to the interior.
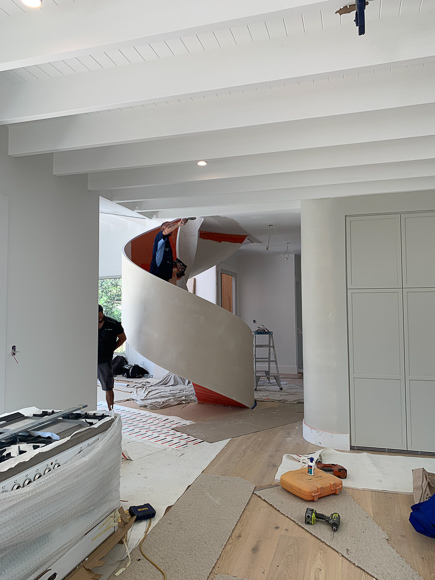
The curved wall – seen from the kitchen into the hallway and rumpus beyond.
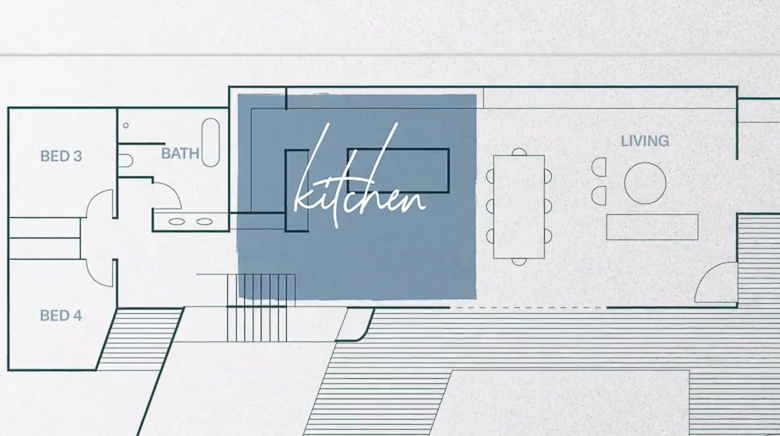
The kitchen : the heart of the home for me!
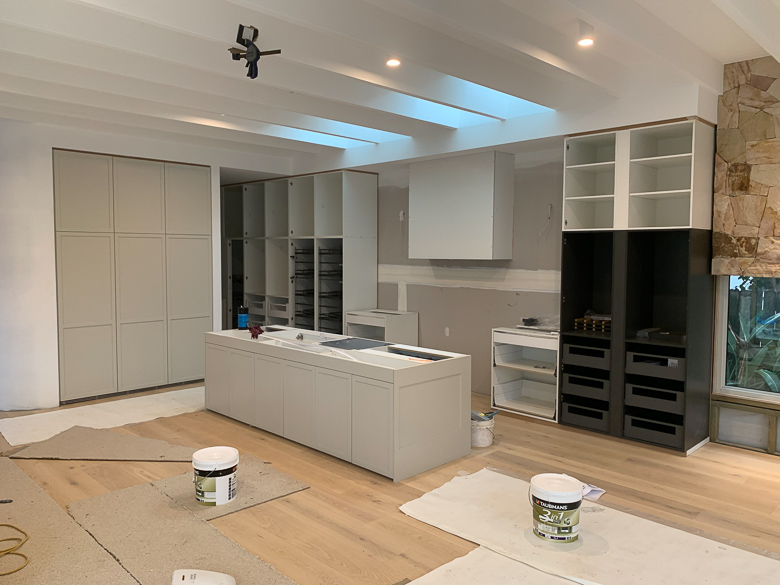
Mid kitchen install.
We’ve factored in two Velux skylights directly over the kitchen thoroughfare however, we’ve kept the lines of the Hyne Beams to run across the skylights. We love this detail as it’s a little different to what we’ve done previously. It’s such a nice surprise standing in the kitchen and looking up at the trees that run along the back of the house.
Early on we enlisted Jasper Design Group to manufacture our kitchen joinery. Along one wall we have integrated the fridge and freezer, and the cabinetry has been custom painted in Taubmans ‘Tinseltown’ in a satin finish. For a seamless look we’ve also painted the gyprock curved wall in Taubmans Ensure ‘Tinseltown’, but in a low sheen finish. The skirting along this wall – which continues along the hallway is the same as we’ve used throughout the home, Corinthian Doors Bullnose 190x18mm, but unlike other rooms we’ve also painted this in Taubmans Endure ‘Tinseltown’ (semi gloss finish) to ensure the wall and curve maintain a seamless look.
The cabinetry at the end of the kitchen (next to the window) hides a structural steel column.
We’ve chosen to do the internals of this joinery in Formica ‘Asphalt’ as this will be a bar area when the doors are open. For the poly doors, we’ve chosen a shaker style cabinetry with 60mm rails. The long run of cabinetry along the back wall will feature custom Oak shaker cabinetry made by none other than Loughlin Furniture.
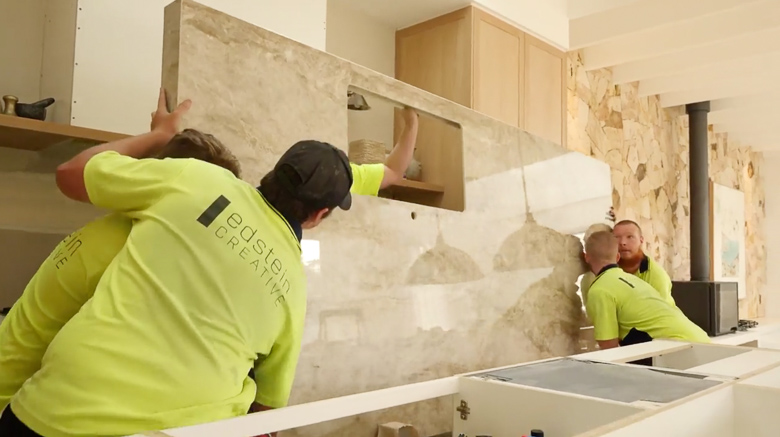
The Dekton ‘Taga’ island bench being installed the Edstein Creative team.
There are two big heros in the kitchen for me – the first one being the island bench, for which we’ve chosen Dekton ‘Taga’ from Cosentino. We’ve used Dekton ‘Liquid Shell’ (also from Cosentino) for the opposite benchtops, rangehood cladding and also the bench seat that runs the length of the dining and living areas. This is such a beautiful finish which has a very subtle texture and glean in the light – almost like the inside of a shell!
The second statement in the room is the ILVE freestanding oven from their Majestic Series. WOW. Talk about the oven of my dreams! I’m one of 9 children and we do have big cook-ups when we’re all together so this will be put to good use, but I’m feeling very lucky to call this ours.
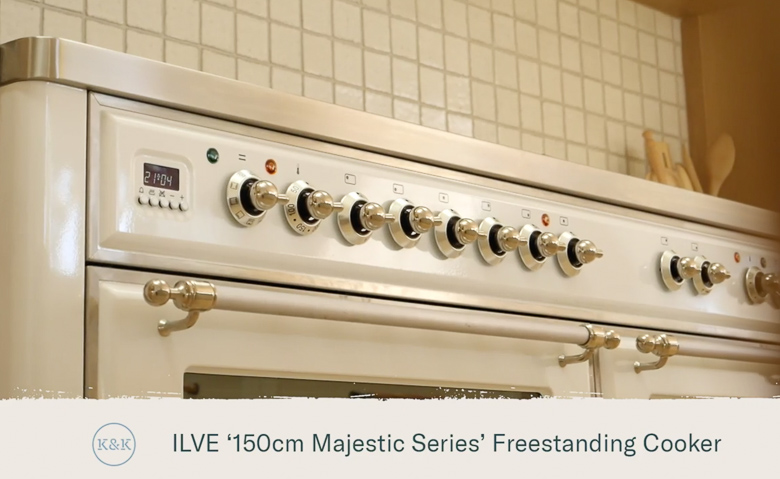
This is going to be put to good use!
You may remember early on in the build that our sink wasn’t in the island bench, but on the same wall as the cooker. I’m SO glad that I had Kyal change this, which at the time felt like a set back but is now a distant memory (for me, anyway!)

Back in the living room, Kyal has framed up the fireplace concrete bench all ready for the fireplace installation. We’ve had Jasper Design Group make up drawers for underneath the bench seating. The drawer fronts are Polytec ‘Ascot’ thermo doors in ‘Amaro Matt’ and the bench is Dekton ‘Liquid Shell’ from Cosentino. The fireplace hearth is also Dekton ‘Liquid Shell’.
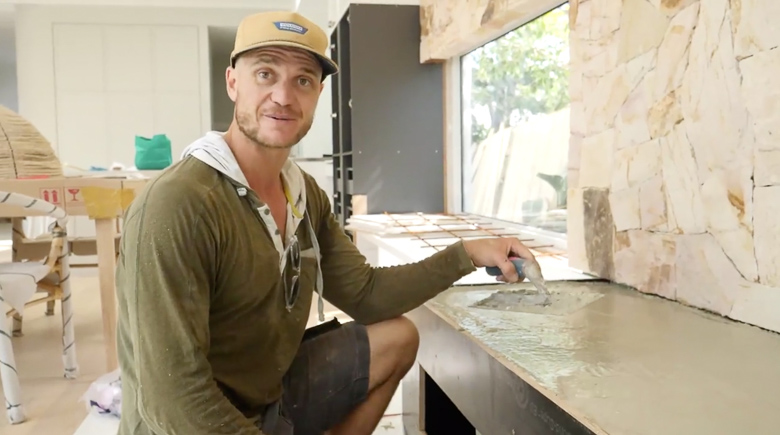
Kyal framing up the concrete fireplace bench.
One of the final pieces of the puzzle to this space is the hanging pendants in the void, and of course it was a very funny afternoon with our electrician Trev from Sparky & Co making me laugh at how annoying I must sound when hanging pendants to achieve the correct height!
The void all ready for pendants….
Click here to watch Blue Lagoon Build Episode 7 – This is Living
Blue Lagoon Build series is proudly brought to you with the support of RAMS Home Loans